Direct Checkout Design Guide
Please refer to our partner checkout design guide if you integrated Billie via Klarna, Adyen or Mollie.
In order to ensure customers understand the payment methods offered and have a consistent experience with Billie across multiple platforms, we have created this comprehensive step-by-step guide on how to display Billie on your checkout page.
Below you will find our Billie Badge, as well as the correct labels for Payment Descriptor, Additional Subheading, and Additional Payment Information.
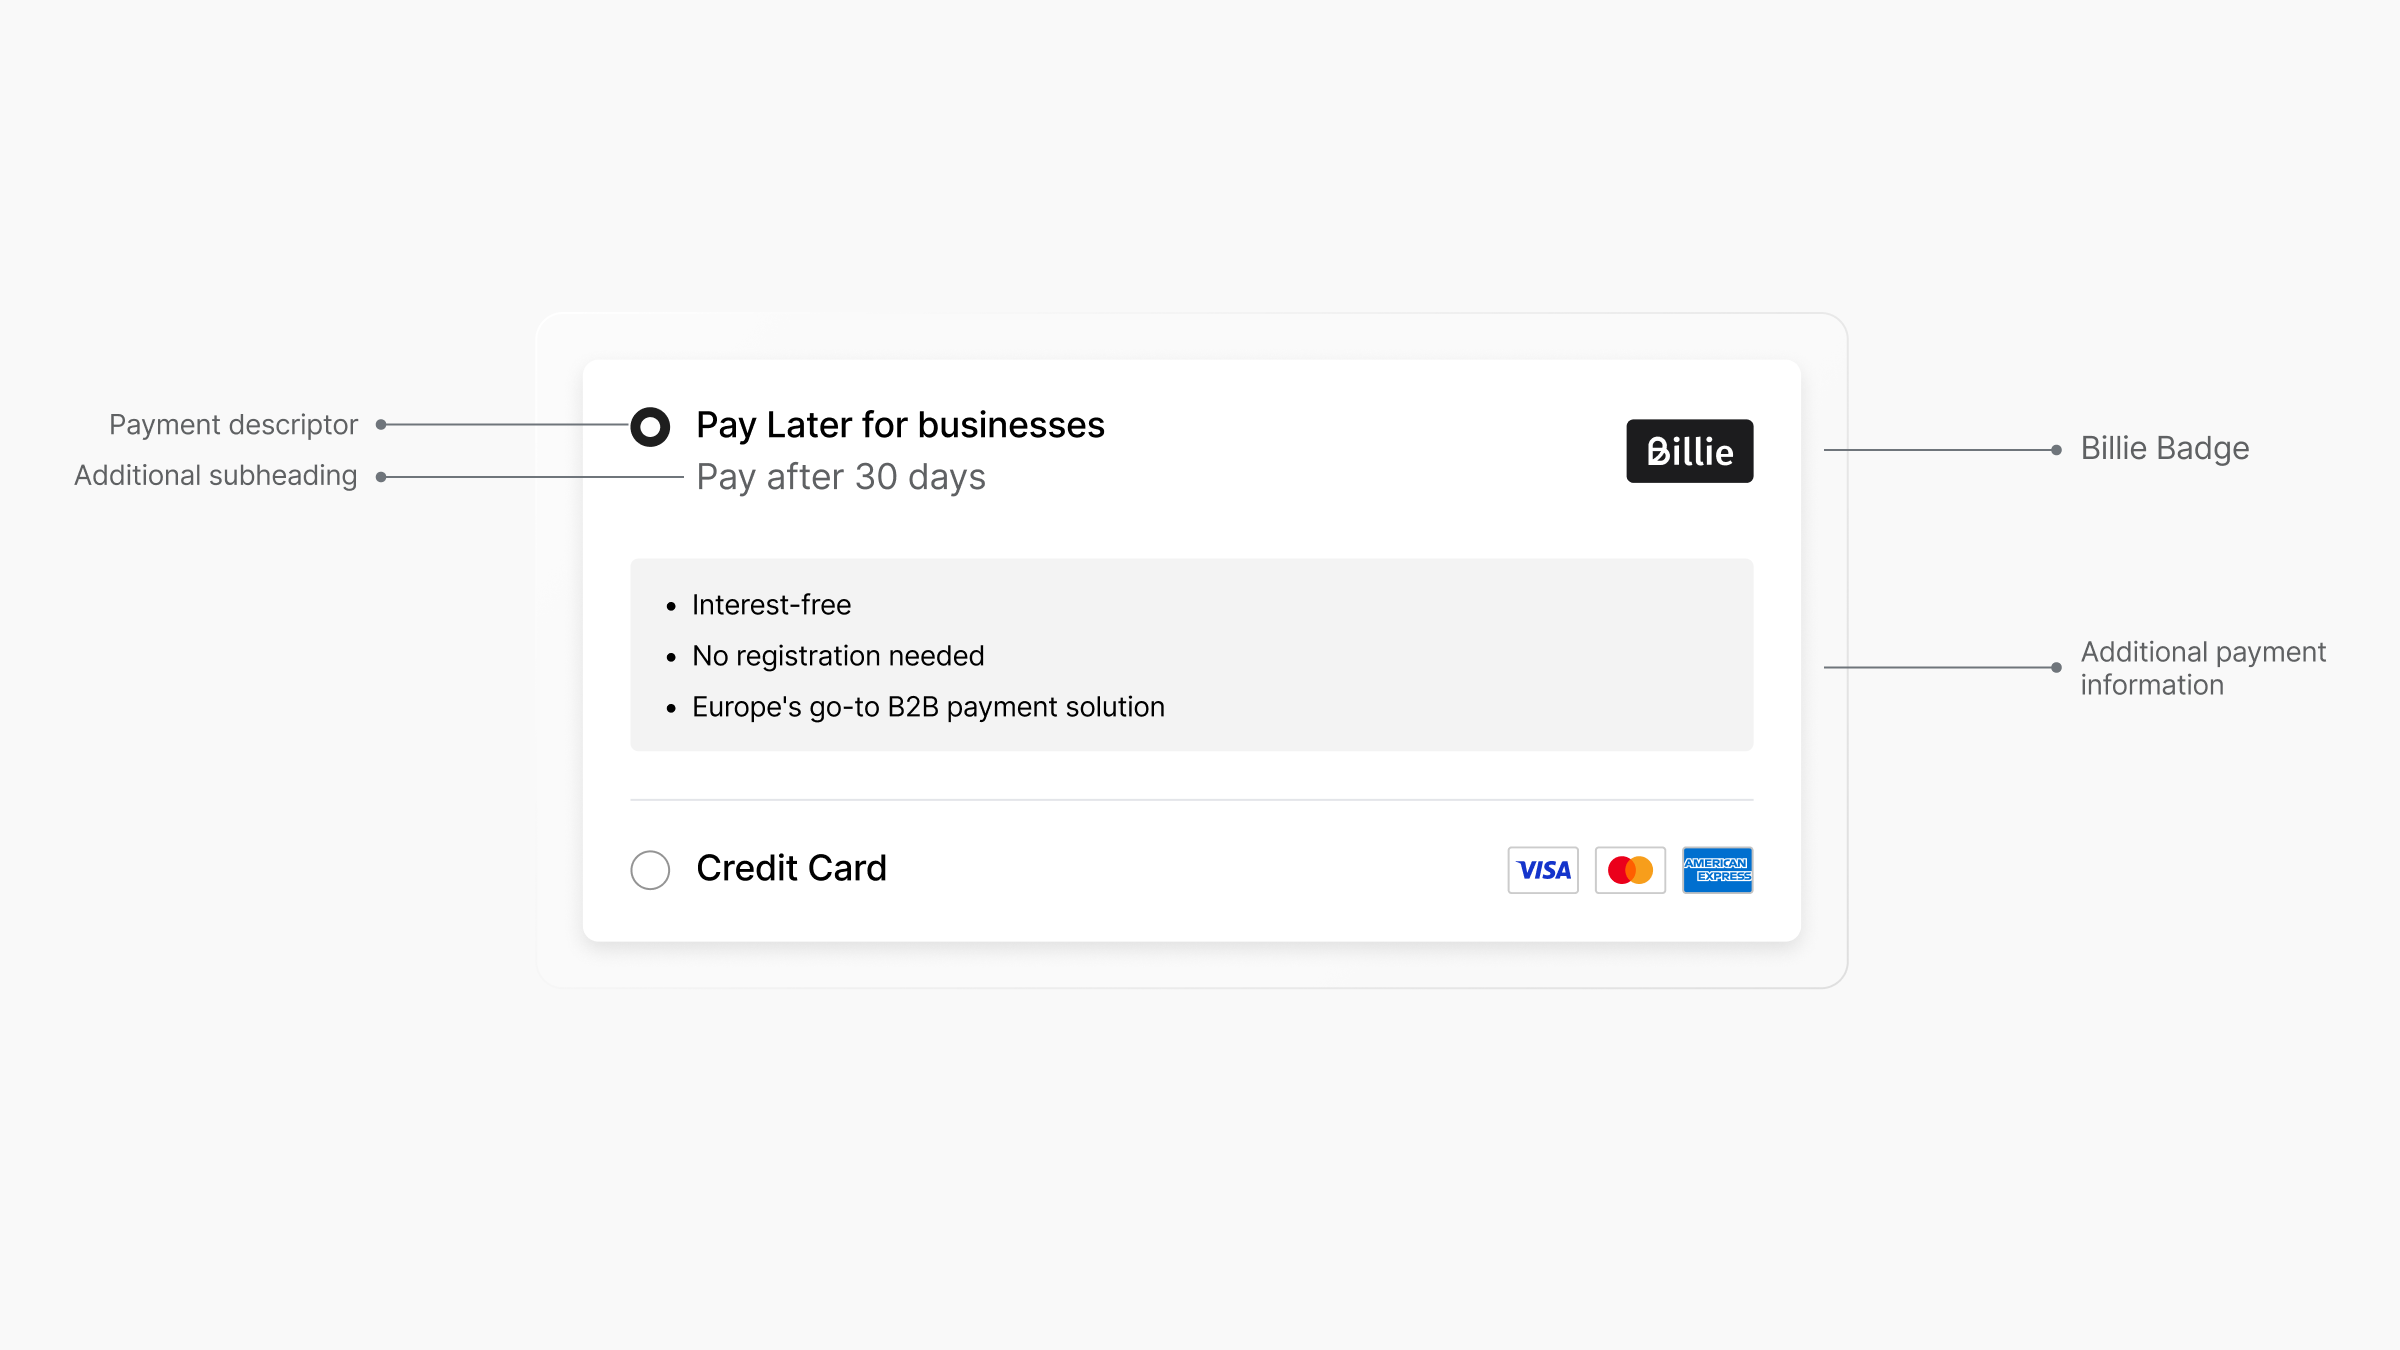
Step 1: Add in the correct labels for payment information
Let's start with selecting the correct labels, which you can copy from the table below:
Variant 1 (default)
| Payment Descriptor (DE) | Additional Subheading (DE) | Additional Payment Information (DE) |
|---|---|---|
| Kauf auf Rechnung für Firmenkunden | Jetzt kaufen, erst in [XX] Tagen bezahlen |
|
| Payment Descriptor (EN) | Additional Subheading (EN) | Additional Payment Information (EN) |
|---|---|---|
| Pay Later for businesses | Pay after [XX] days |
|
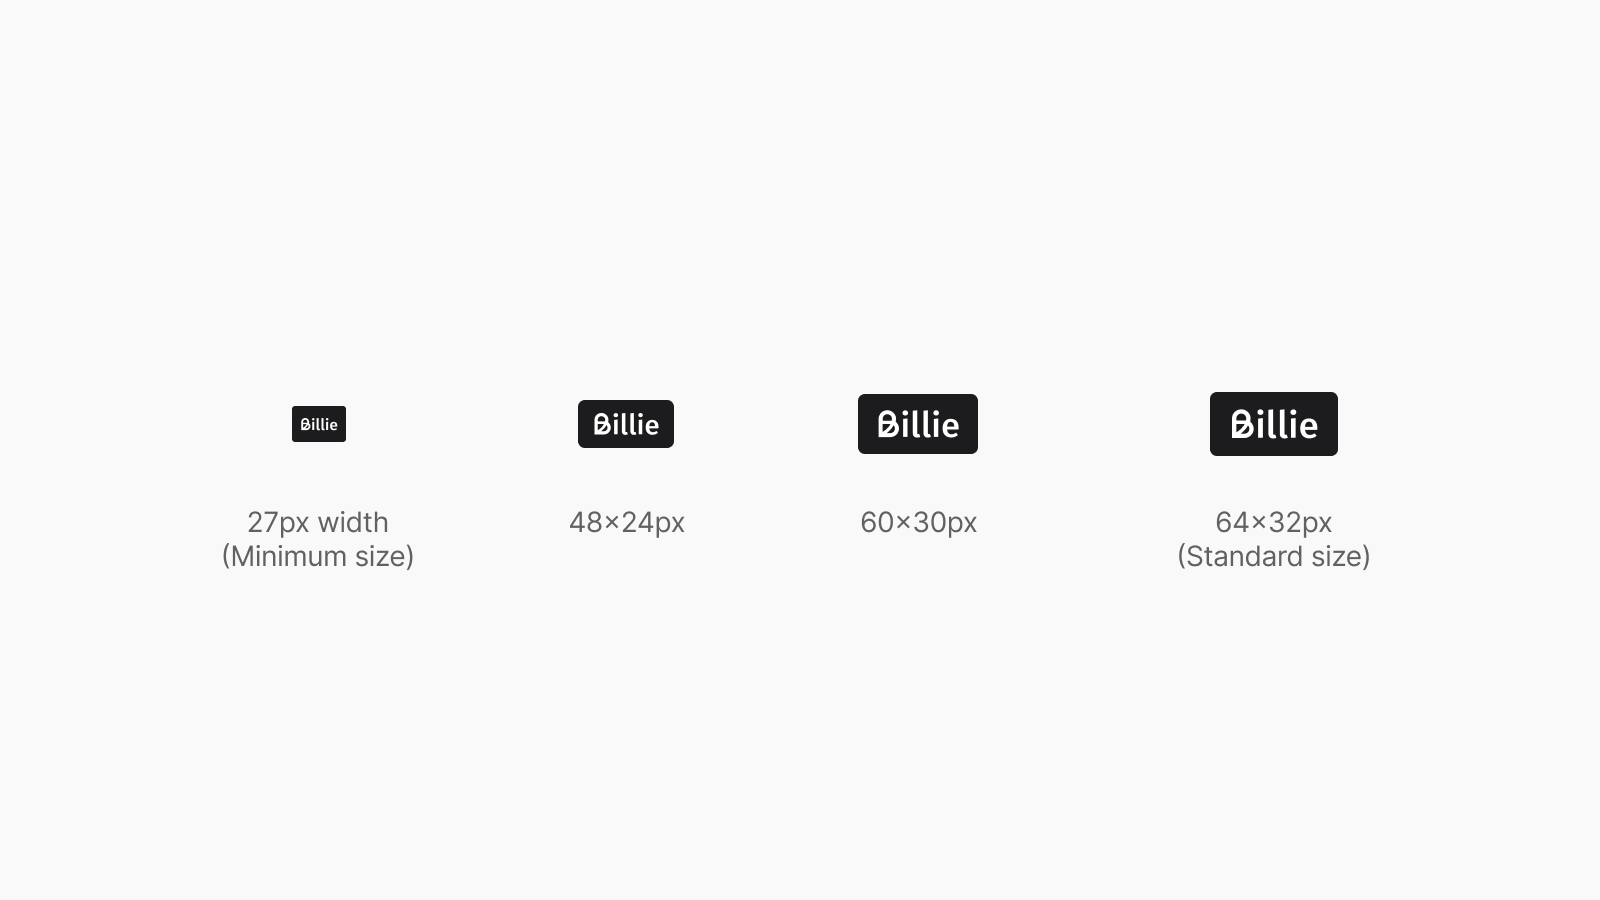
Step 2: Integrate the Billie Checkout Badge
The standard size for implementation is 64px x 32px. The minimum size is 27px width.
Refer to the following links to implement the Billie Checkout Badge:
SVG
https://static.billie.io/badges/Billie_Checkout_Default.svgPNG
https://static.billie.io/badges/Billie_Checkout_Default.pngOur preferred integration features our Billie black badge as seen above. It should always be displayed alongside the Payment Descriptor and should never overlap with other content, such as text or other elements.
If your checkout has a dark background and does not offer visibility against our standard badge, a white badge is also available.
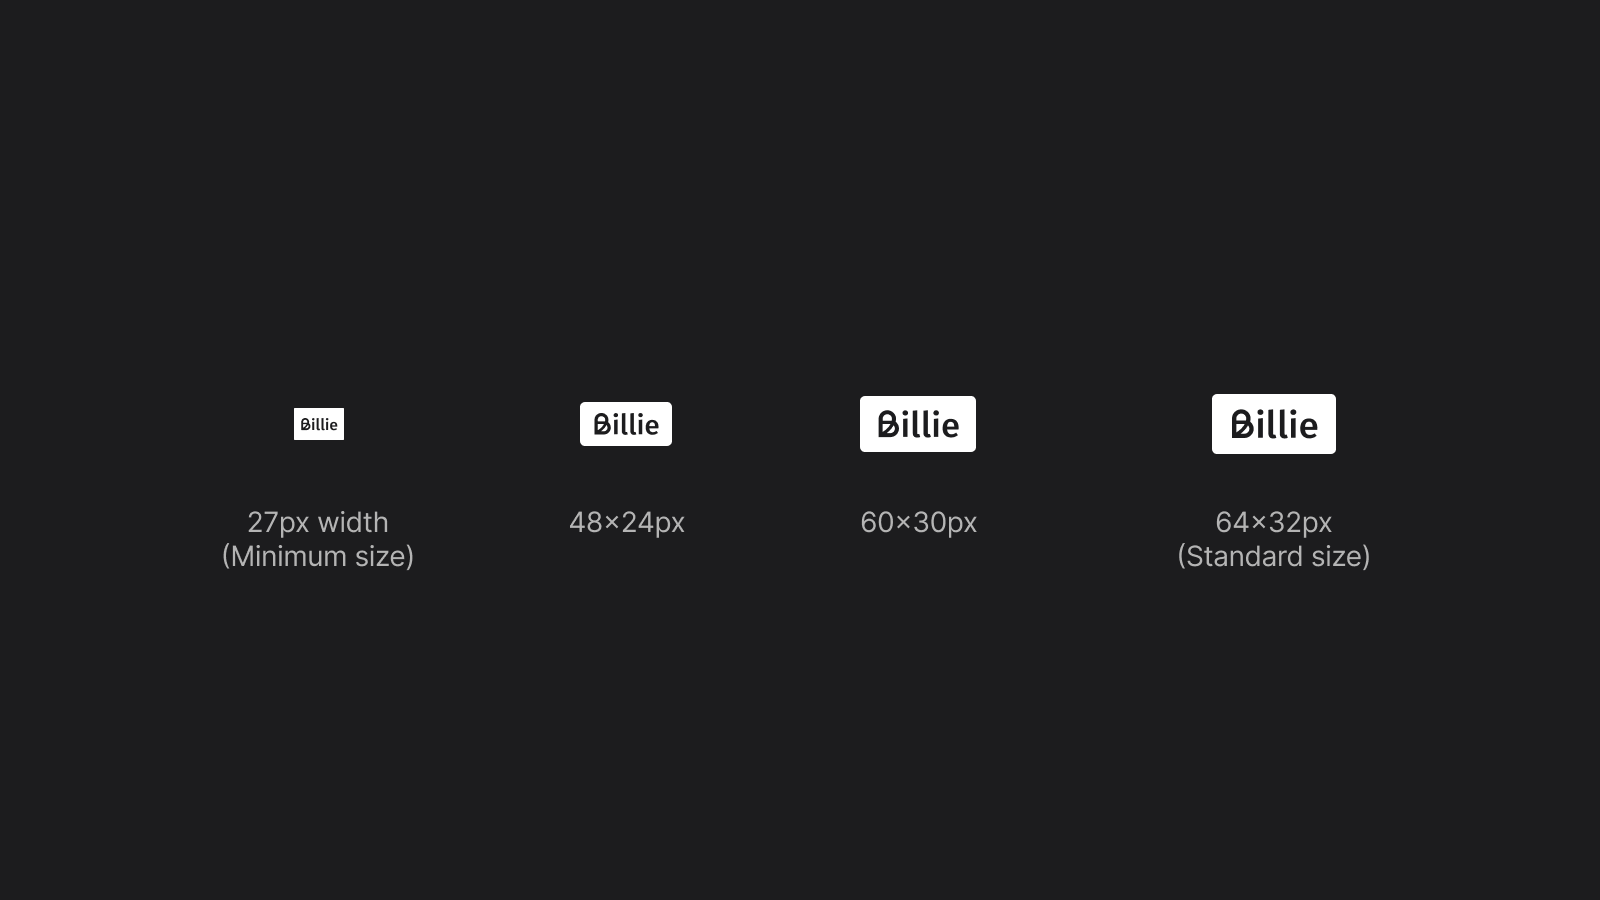
Refer to the following links to implement the white Billie Badge:
SVG
https://static.billie.io/badges/Billie_Checkout_White.svgPNG
https://static.billie.io/badges/Billie_Checkout_White.png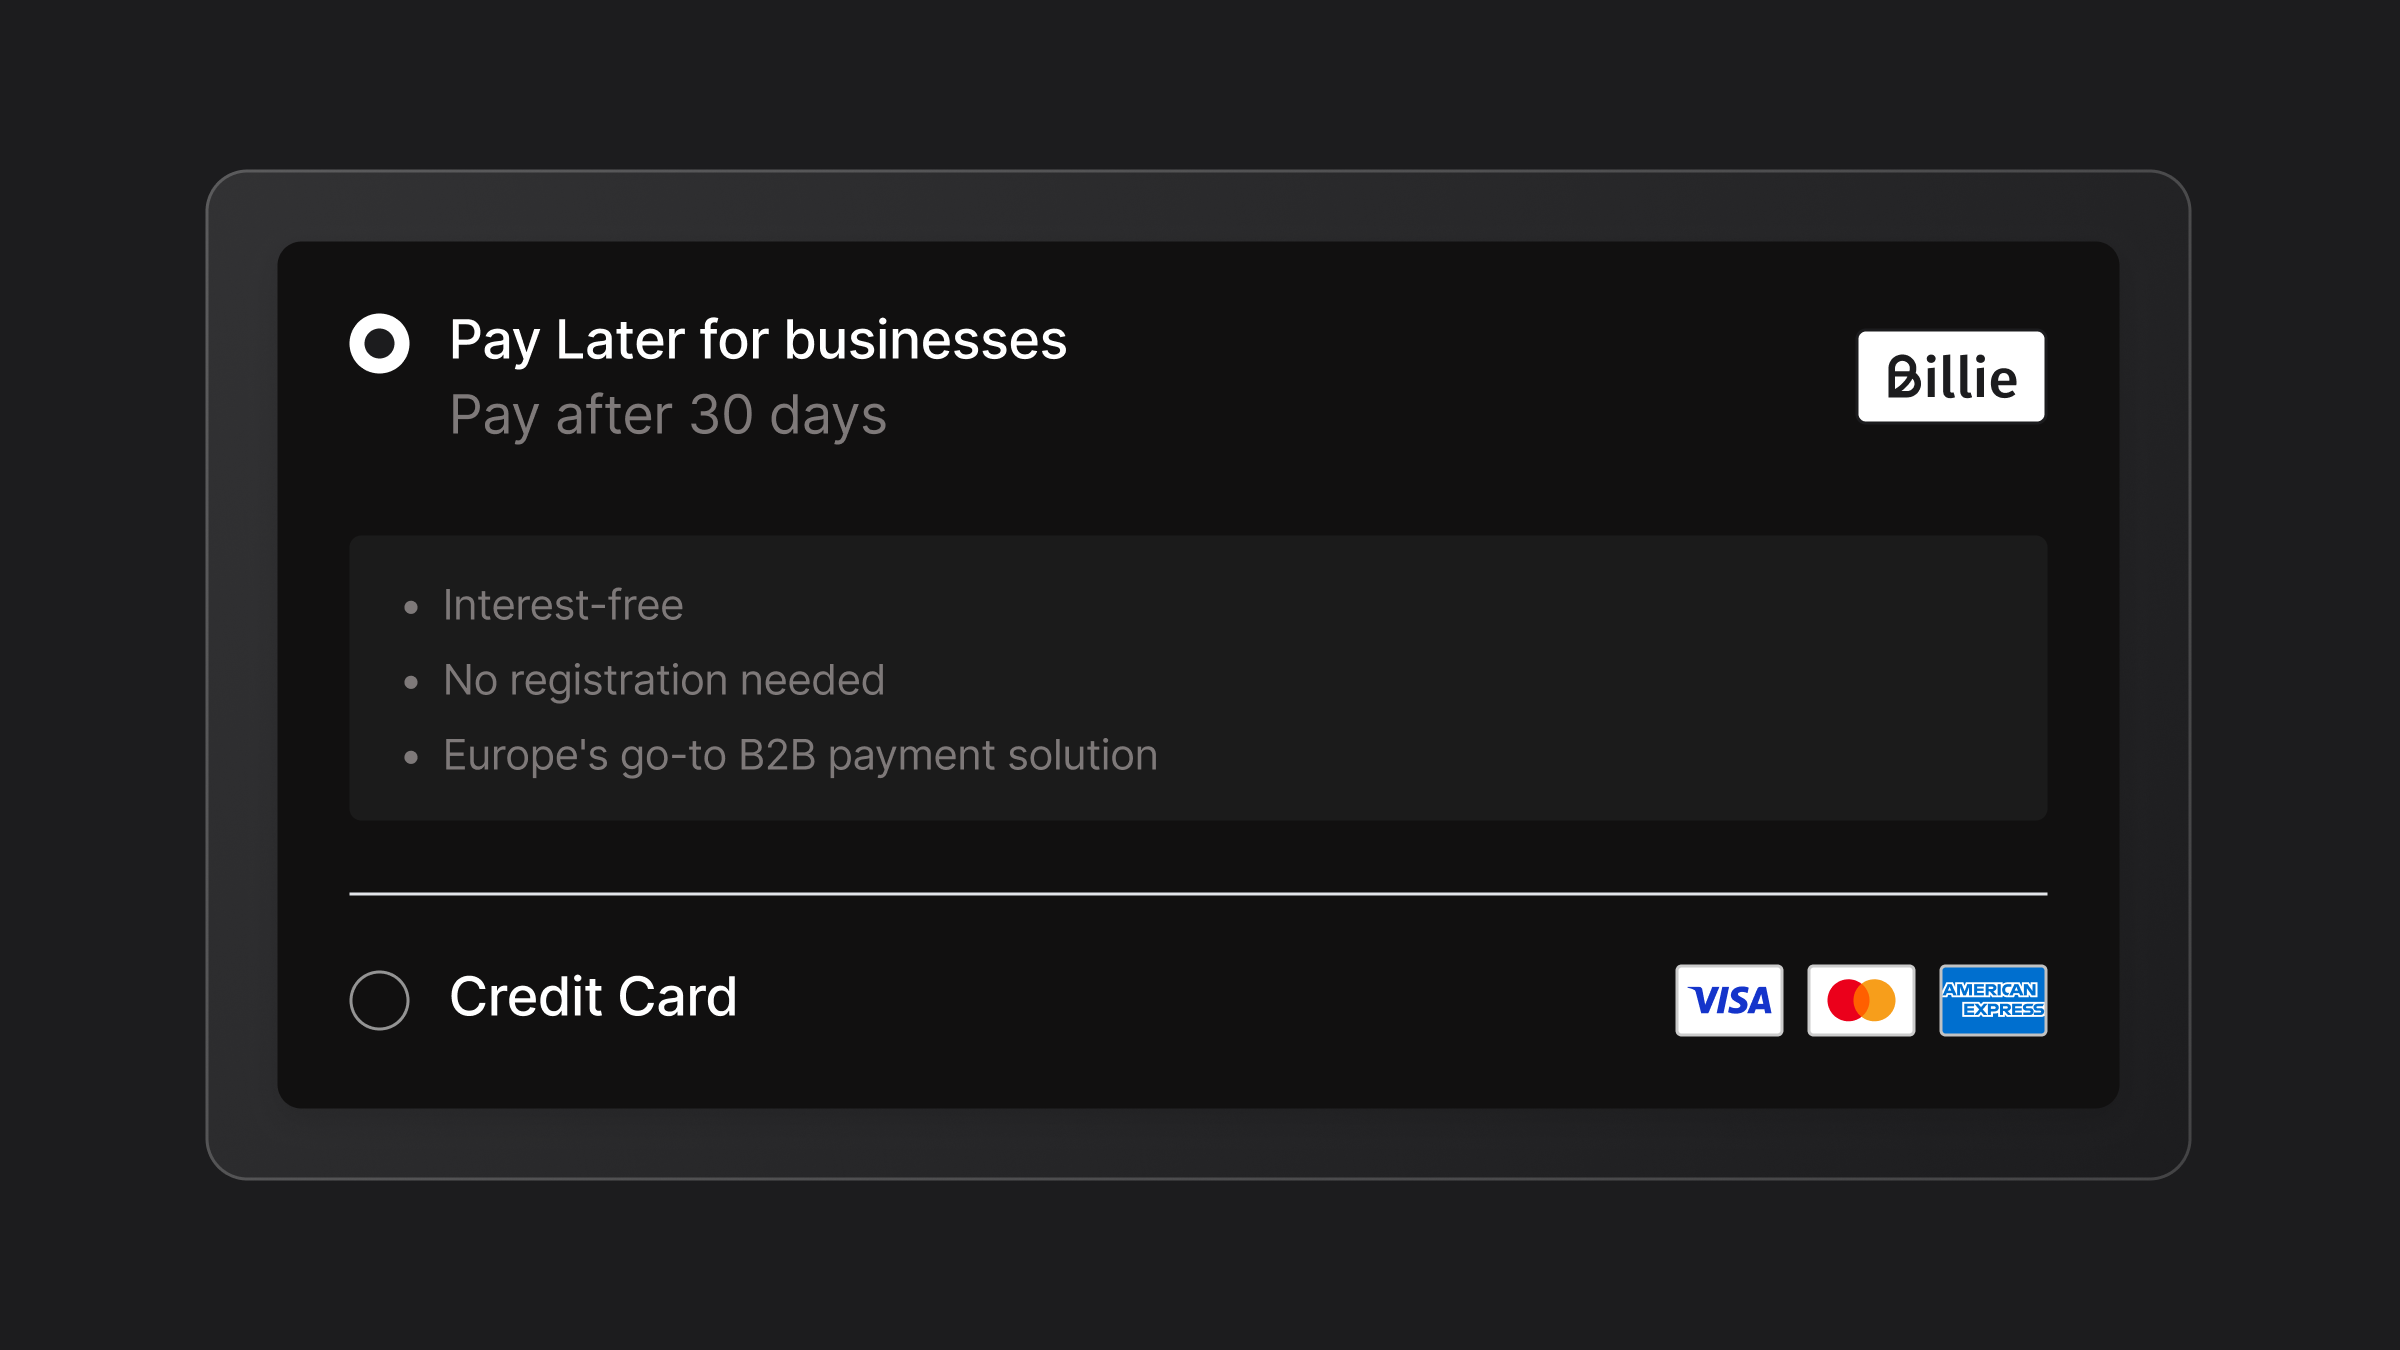
If you need support on integration best practices, please feel free to contact us.
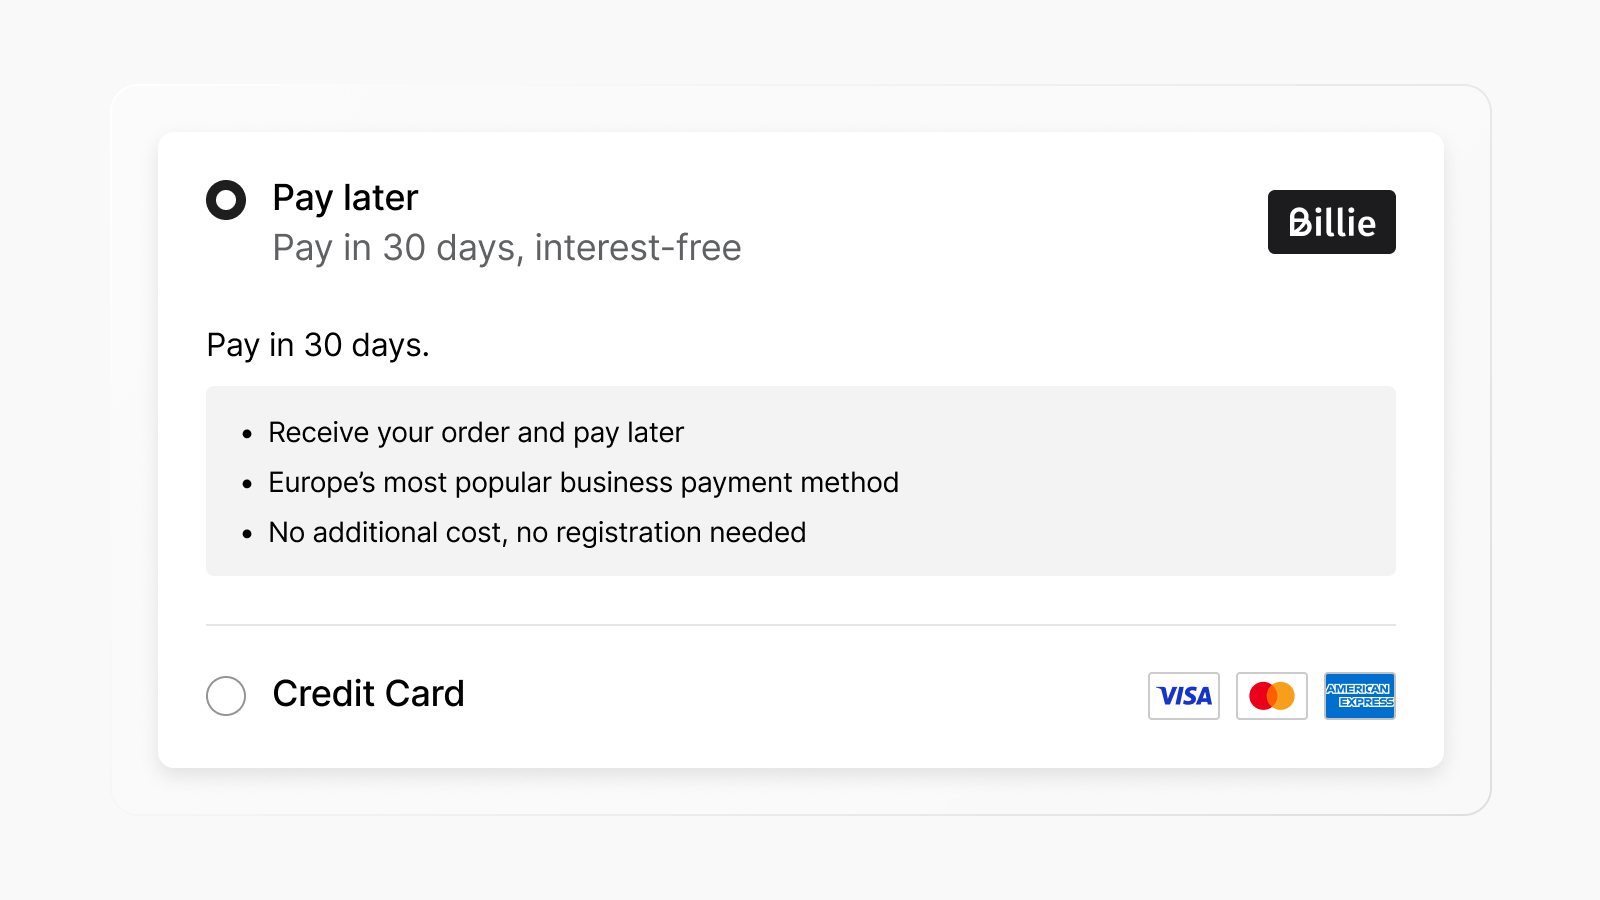
Step 3: Check your results!
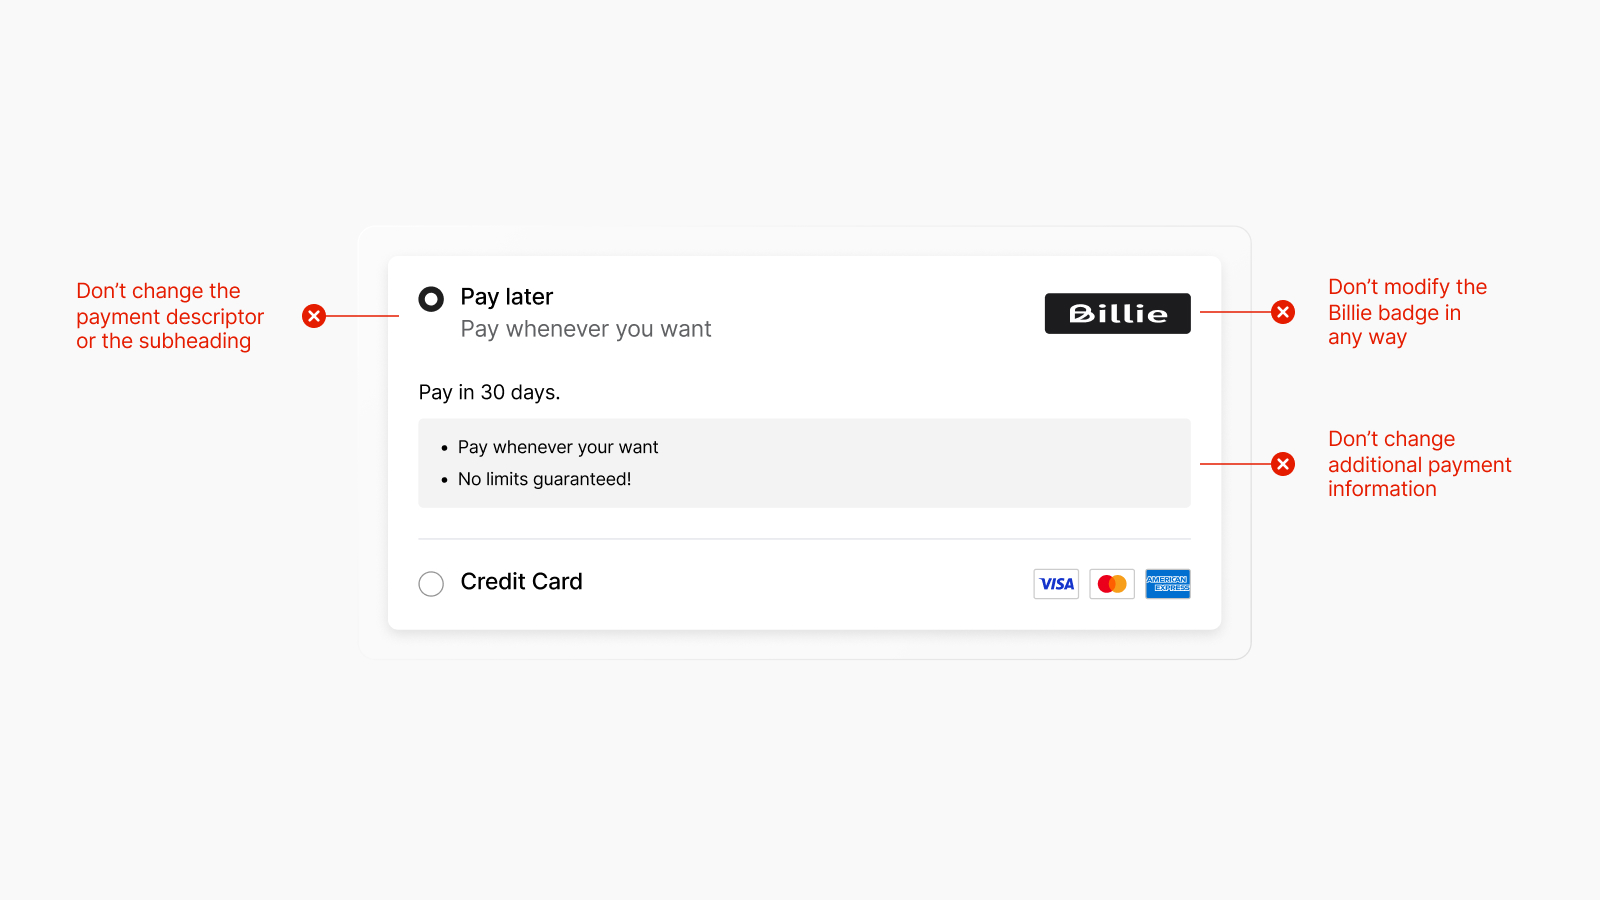
Please ensure that all the elements have been implemented properly. You can use our "Don'ts" overview below to make sure that you have taken all the right steps.
Don'ts
Updated 7 months ago